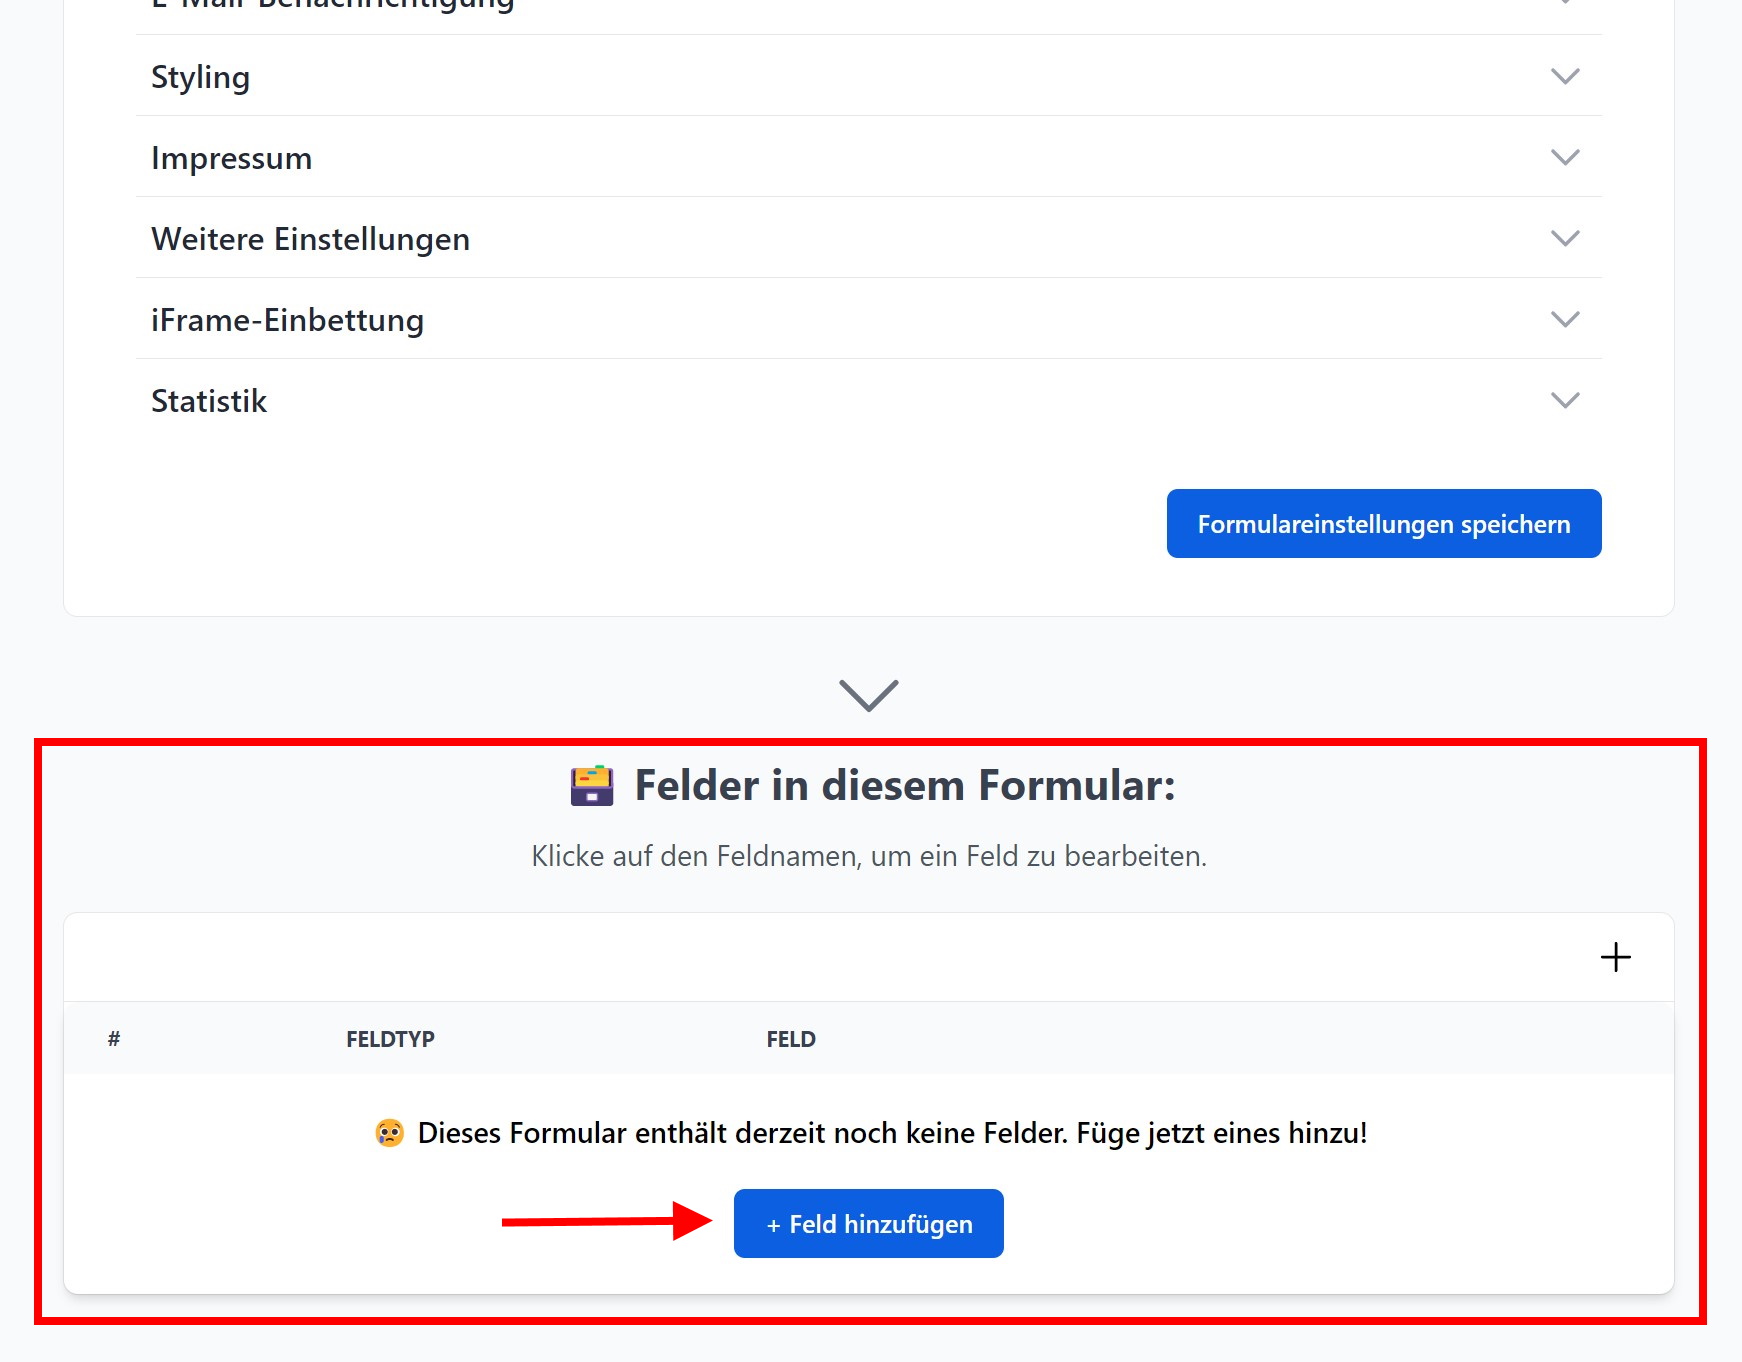
Create & edit fields
When you create a new form or edit an existing one, you will find the list of fields under the form settings. Click "Add field" to add fields to the form.
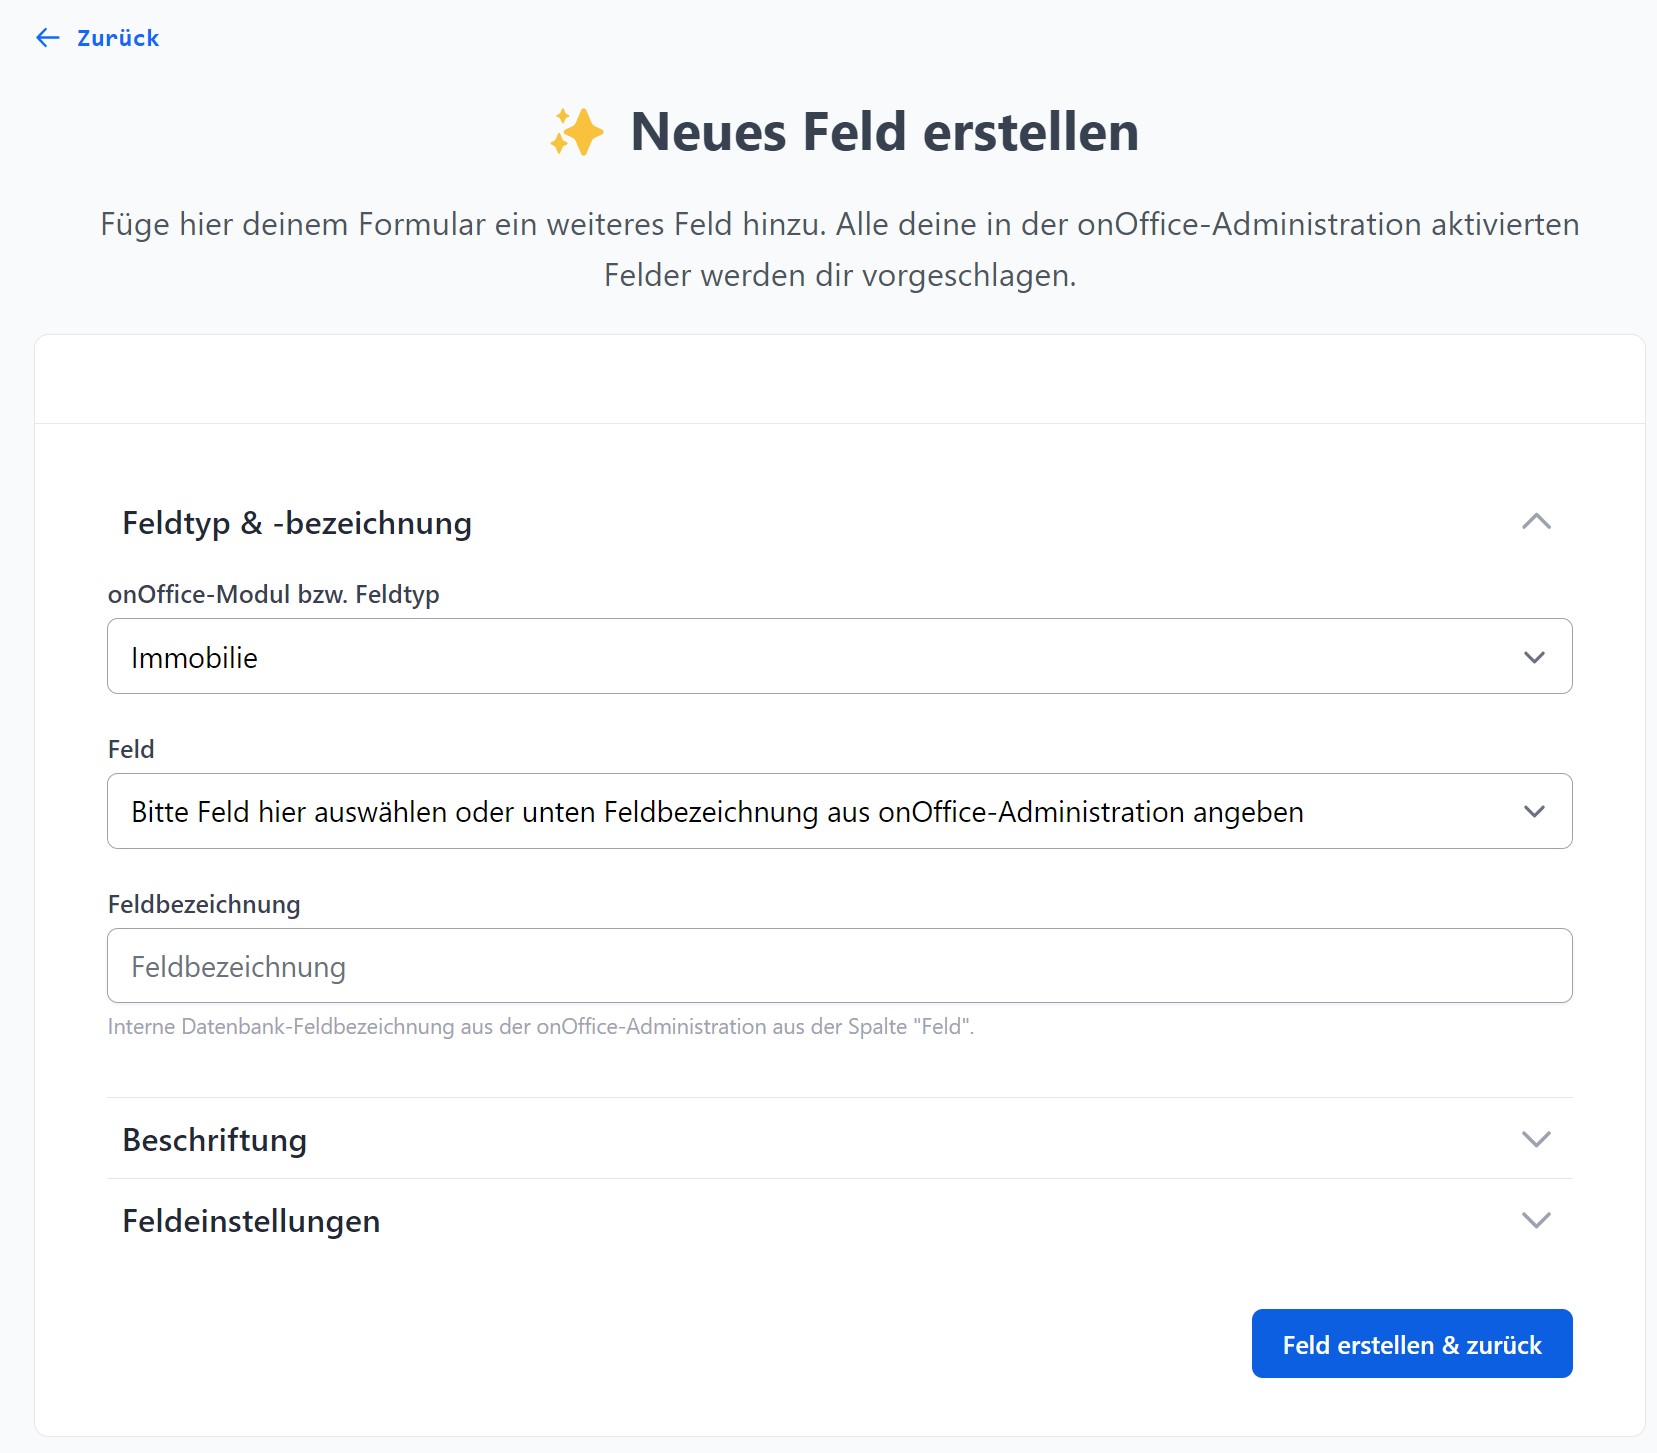
Edit field
When you create a new field or edit an existing one, you will be taken to the field settings for the respective field.
-
First, select the field type for the field. Here, you can choose from various onOffice modules (Property, Address, Task, Activity, Appointment and Project). However, there are also other field types available, such as Line Break, Heading, Description or Link Button.
-
If you have selected an onOffice module, e.g. Property, as the field type, the available fields in this module from your onOffice version will be displayed under "Field" for you to select. > If a field is not listed, please ensure that it is activated in your onOffice administration.
-
On the "Label" tab, you can change the field heading. If you do not specify a label for the field, the name will be taken from your onOffice administration. You can also add a short note here, which will be displayed below the field in the form.
-
In the field settings, you can configure further settings for the field. Exactly what these are is explained here.
-
Click on "Save field & back".
Other useful information:
- Search criteria fields must be defined as such in your onOffice administration so that they are available for selection in propform.io.
- Fields can be added to the form multiple times; however, if there are two identical fields (same field type, same field name), only the last/bottom field will be submitted.
- For many onOffice modules, there is also the "Upload file" option, which adds a file upload field to the form that can upload multiple files. For properties, there is also the option to create fields for file description and document characteristics. However, these are only applied to the first file uploaded using a "Upload file" field per form.
- You can also add file fields from the address and property templates to the form. To do this, select your created file field under "Field".